
Guide to Choosing Bathroom Cleaning Products That Work
Your bathroom is one of the most-used spaces in your home. It’s a hub for personal hygiene, yet it can quickly become a breeding ground for germs and grime if neglected.
Did you know that the average bathroom harbours 200 times more bacteria than a kitchen sink? That’s not exactly what you want for the one spot you go to get all freshened up. Clutter and mess can also raise stress levels. Walking into a clean, fresh-smelling bathroom can feel like a small win in your day. And who doesn’t need more of those?
Do you feel overwhelmed when thikning of all that is needed to clean the bathroom? That’s understandable. Bathrooms have a mix of surfaces—tiles, glass, metal, and wood—each with its own cleaning needs. Add to that the variety of cleaning products on the market, and it’s no surprise some people don’t know where to start.
With the right tools, products, and techniques, it’s actually easy. Many people grab whatever’s cheapest or closest to hand, but that can backfire. Some products might be too harsh for delicate surfaces, while others might leave streaks or residue. A bad product can make your job harder.
This guide breaks it all down, including tools that save you time, and products that really work.
The Chemistry of Cleaning
Your bathroom might look like a quiet space, but on a microscopic level, it’s chaos. Dirt, grease, and germs cling to surfaces, and only chemistry can kick them out.
Let’s start with surfactants. These clever molecules are the backbone of most cleaning products. They have two ends—one that loves water and another that loves grease. When you spray or scrub, surfactants surround greasy particles and lift them off surfaces. It’s like they break up the party and escort the grease out the door.
But grease isn’t the only villain. Bathrooms are breeding grounds for bacteria, viruses, and fungi. This is where antibacterial agents step in. Chemicals like benzalkonium chloride or hydrogen peroxide disrupt the cell walls of bacteria, effectively wiping them out.
And don’t underestimate limescale. If you live in a hard water area, you know the struggle. Those white crusty deposits are made of calcium carbonate, which forms when water evaporates. Acid-based cleaners, like those with citric or acetic acid, dissolve the deposits, leaving your surfaces smooth again.
Foaming agents are another fascinating addition. They don’t just make your cleaner look effective—they serve a purpose. Foam sticks to surfaces longer, giving active ingredients more time to work. This is especially useful for vertical surfaces like shower walls.
Even the fragrances in cleaning products aren’t just about smelling nice. Certain scents, like citrus or eucalyptus, have mild antibacterial properties. And they leave your bathroom smelling fresh, which can make a tough cleaning job feel rewarding.
But let’s not forget safety. The pH level of a cleaner matters. Acidic products (low pH) tackle limescale, while alkaline products (high pH) fight grease. Neutral cleaners (pH around 7) are gentler, making them ideal for delicate surfaces like marble or granite. Choosing the wrong pH can damage surfaces, so it pays to read labels carefully.
Lastly, think about water. Many cleaning products are water-based because water acts as a solvent, helping active ingredients dissolve and spread evenly. Without it, your cleaner wouldn’t perform nearly as well.
Bathroom Dirt: What You’re Up Against
-
Soap Scum
This is that stubborn white or grey film you see on tiles, shower doors, and sinks. It forms when soap mixes with minerals in water, creating a sticky residue. If left unchecked, it hardens and becomes almost cement-like. It can trap bacteria and grime, making your bathroom a breeding ground for germs.
-
Hard Water Deposits
If your water supply is rich in calcium and magnesium, you’ll notice chalky white or yellow deposits. These are limescale stains, and they cling to taps, showerheads, and even toilet bowls. Hard water isn’t just ugly; it can reduce the efficiency of your fixtures by clogging pipes and leaving residue.
-
Mould and mildew
These fungi thrive in warm, damp spaces, making bathrooms their ideal habitat. You’ll spot mould as dark patches, often on grout lines or ceilings, while mildew appears as a lighter, powdery substance. They can trigger allergies and respiratory issues.
-
Dust and hair
These seem harmless, but they combine with bathroom moisture to form a sticky mess. It’s not uncommon to find clumps of hair mixed with dust around the base of the toilet or in shower drains.
Different surfaces make this dirt harder to tackle. Porous materials like grout or natural stone absorb moisture and dirt, creating the perfect hiding spots for mould and bacteria. Glass and chrome, on the other hand, show every streak and smudge, making them unforgiving if not cleaned properly.
-
Pathogens
Bacteria like E. coli can linger in the bowl after flushing, spreading through microscopic droplets that settle on nearby surfaces. In fact, flushing a toilet can send droplets as high as six feet into the air.
Bacteria can double in number every 20 minutes in moist, warm environments. This makes your bathroom one of the most bacteria-friendly places in your home. Properly formulated cleaners break down biofilms (that slimy layer of germs) and prevent regrowth.
Bathroom Cleaning Tools
Products alone won’t do the job; your accessories make all the difference.
Brushes
Soft-bristled brushes are excellent for delicate surfaces, such as ceramic tiles or polished fixtures. They clean without leaving scratches behind. On the other hand, stiff-bristled brushes are perfect for tougher jobs, like scrubbing grout lines or removing soap scum from shower walls.
Using the wrong bristle strength can ruin your surfaces. Soft brushes won’t tackle tough grime, while hard brushes might damage finishes. Choose carefully.
Shape matters, too. Angled brushes help you reach tight corners, while flat brushes are great for covering larger areas quickly. Some brushes even come with narrow, pointed ends for crevices that are otherwise impossible to clean. For example, the space between your tap and sink can collect grime that regular tools just can’t touch.
Ergonomics are crucial. Cleaning is a physical task, and poorly designed tools can leave you with sore hands or a stiff back. Look for brushes with comfortable grips. Rubber-coated handles are ideal—they won’t slip, even if your hands are wet. Adjustable or telescopic handles can save your knees and back when scrubbing floors or reaching high tiles.
Modern toilet brush designs come with splash guards or caddies that minimise drips. Some even feature built-in scrub pads for tackling tough stains. A clean brush is just as important as a clean toilet, so pick one with replaceable heads or antimicrobial properties.
If scrubbing by hand isn’t your thing, there are electric scrubbers. These battery-powered tools do the hard work for you, spinning bristles at high speeds to cut through dirt. They’re particularly useful for grout and soap scum, saving you time and effort.
Finally, think about longevity. Cheap brushes might shed bristles or lose their effectiveness after a few uses. Invest in quality tools, and they’ll pay off in the long run.
Microfibre Technology
Microfibre cloths have tiny fibres, each about 100 times thinner than a human hair. These are very effective at grabbing dirt, dust, and bacteria.
It’s all about the weave. The ultra-fine fibres create more surface area, giving the cloth incredible grip. This means dirt, grease, and water aren’t just pushed around—they’re trapped. It’s so effective that microfibre can remove bacteria with just water. No harsh chemicals needed.
Traditional cloths leave streaks, smudges, or lint behind when polishing glass or mirrors. Not microfibre. Its super-fine weave ensures a flawless finish, every single time. Even stainless steel, notorious for showing every fingerprint, looks spotless with the right microfibre cloth.
But it’s not just about what microfibre does—it’s how it lasts. These cloths are durable. With proper care, a single cloth can handle up to 500 washes without losing its effectiveness. That’s months, even years, of spotless cleaning from one small investment.
Caring for microfibre is simple. Wash it separately to avoid lint. Use a gentle detergent—skip the fabric softener, as it clogs the fibres. Let it air dry or tumble on low. Treated well, these cloths will outlast most other cleaning tools.
Microfibre cloths cut down your need for disposable wipes and excessive cleaning chemicals. They’re reusable, washable, and versatile. One cloth for your windows, another for tiles, and another for dusting furniture.
Advanced Tools
These tools save time, reduce physical strain, and often do a better job than manual methods:
- Steam cleaners: They use hot vapour to sanitise surfaces, cutting through grime and killing germs without chemicals. They’re brilliant for deep-cleaning tiles, grout, and even glass.
Use them on shower walls to blast away soap scum or on floor tiles to lift stubborn dirt. Some even come with attachments for detailed cleaning, like grout lines or behind taps. And because they don’t rely on harsh chemicals, they’re perfect for homes with pets or children.
- Extendable tools: These are for anyone tired of straining to reach awkward spaces. Think telescopic handles for scrubbing ceiling tiles or cleaning around light fixtures. A tool like this lets you clean high corners or deep recesses without pulling out a ladder.
Some of these tools are designed with clever add-ons. For instance, swivel heads can adjust to tricky angles, making it easier to clean behind toilets or under sinks. Rubber grips give you better control, even when your hands are wet. Small details, but they make a huge difference.
- Motorised scrubbers: These handheld tools spin at high speeds, taking the effort out of scrubbing. They’re ideal for tackling grout, soap scum, or hard water stains on showerheads.
- Squeegees: Some models now feature built-in reservoirs that dispense cleaning fluid as you go. One swipe leaves your surface spotless—no streaks, no fuss.
- Spray Mops: Even traditional tools are getting upgrades. Floor mops now come with spray mechanisms, allowing you to apply just the right amount of cleaner as you mop. No more dragging a heavy bucket around.
Targeted Cleaning Solutions by Surface
Porcelain and Ceramic
Porcelain and ceramic are the workhorses of the bathroom. Sinks, toilets, and bathtubs rely on these durable materials to handle water, soap, and daily use. But while they’re tough, they’re not invincible. The surfaces are glazed, giving them a smooth, water-resistant coating. This makes them easier to clean, but it doesn’t mean grime can’t cling on. Soap scum, hard water spots, and mineral deposits are common culprits. If left too long, they can dull the shine and make your bathroom look tired.
Another major issue is scratches.Abrasive cleaners or scrubbers can leave marks. Once the glaze is damaged, dirt and stains settle in more easily. This is why you should always avoid harsh powders or steel wool. They’re tempting, but they can cause long-term damage.
Instead, go for non-abrasive cleaners. Products designed for porcelain are typically pH-balanced, so they remove grime without harming the surface. For everyday cleaning, a liquid or gel cleaner works best. Spray it on, let it sit for a few minutes, then wipe it off with a soft cloth.
For tougher stains, like rust or hard water spots, targeted cleaners are essential. These are formulated with mild acids that dissolve stains without damaging the glaze. If you’re dealing with stubborn residue around taps or drains, use a soft-bristled brush to scrub gently.
Toilets need special care. A toilet bowl cleaner with disinfecting properties tackles germs while breaking down limescale. Apply it under the rim, let it sit, and scrub with a toilet brush. Don’t forget to clean the exterior of the toilet as well—bacteria can linger on the seat, lid, and base.
Bathtubs often collect soap residue, especially if you use bar soap. Liquid soap scum removers are great for breaking it down. Spray generously, wait for a few minutes, and rinse thoroughly. A squeegee can help you remove excess water and prevent streaks.
Don’t forget to dry. Water spots form when moisture evaporates and leaves behind minerals. After cleaning, wipe porcelain and ceramic surfaces with a microfibre cloth. It’s a small step, but it keeps everything looking shiny.
Glass and Chrome
When clean, they sparkle. When dirty, they ruin the whole ambience. Unfortunately, they’re magnets for streaks, fingerprints, and water spots.
Technique matters when dealing with the streaks on your mirrors. Spray too much, and you’ll end up with residue. Spray too little, and smudges remain. The sweet spot is a light mist, followed by a wipe with a microfibre cloth. Microfibre is key here—it grabs dirt without leaving lint behind.
If you’re tackling a heavily soiled mirror, add a step. Dampen a cloth with warm water and wipe first to remove dust and grime. Then, follow up with the glass cleaner. Circular motions work best for removing smudges, while a final swipe with horizontal strokes finishes the job.
Shower doors are another headache. Hard water spots cling to the glass like their lives depend on it. These spots are caused by minerals like calcium and magnesium. If you live in a hard water area, you’ll know the struggle. The fix? A dedicated hard water stain remover. These products dissolve the mineral deposits, leaving the surface clear.
But prevention is even better. After every shower, use a squeegee to remove water from the glass. It takes seconds and keeps hard water spots at bay. Alternatively, applying a water-repellent treatment to the glass can help. These treatments create a barrier, so water beads up and slides off instead of sticking.
Now, on to chrome. Taps, showerheads, and handles all look fantastic when they’re shiny. But chrome shows everything—fingerprints, water spots, and even dust. A simple solution? A gentle cleaner designed for metal finishes. Spray it on, let it sit for a minute, and buff it out with a soft cloth.
For stubborn spots, like limescale around tap bases, use a mix of white vinegar and water. Apply it with a cloth, let it sit for 5–10 minutes, and wipe clean. Avoid abrasive pads, as these can scratch the chrome and ruin the finish.
And don’t forget maintenance. Polishing chrome regularly keeps it looking new. A drop of baby oil or mineral oil works wonders. Apply it sparingly with a cloth, then buff until it gleams. This also adds a protective layer, making future cleaning easier.
Glass and chrome demand attention, but the payoff is worth it. When they’re spotless, your bathroom feels brighter, cleaner, and more inviting. So grab your tools, and let them shine.
Stone and Wood
Both materials can last for decades when treated properly—but neglect them, and they’ll show their age fast.
Let’s start with natural stone. Whether it’s marble, granite, or slate, stone is a stunning choice. But it’s also porous. That means it absorbs water, dirt, and stains if left unprotected. In fact, unsealed stone can soak up liquids like a sponge, leading to discolouration and long-term damage.
This is why sealing is important. A good stone sealant creates an invisible barrier, preventing moisture and grime from seeping in. It’s not a once-and-done process, though. Sealants wear down over time, especially in high-traffic areas like bathrooms. Experts recommend resealing stone surfaces every six to twelve months.
Avoid acidic cleaners like vinegar or lemon juice—they can etch the surface, leaving dull spots. Instead, use a pH-neutral cleaner designed specifically for stone. Apply it with a soft cloth or mop, and rinse thoroughly to avoid residue.
If you notice a stubborn stain, don’t panic. A paste made from baking soda and water can lift many marks without harming the surface. Apply it to the stain, cover it with cling film, and leave it overnight. Rinse it off in the morning, and the stain should be gone.
Wood presents a different set of challenges. Bathrooms are harsh environments for wood because of constant moisture and fluctuating temperatures. This can cause warping, cracking, or even mould growth if the wood isn’t properly protected.
The key is finishing. Varnishes, oils, and lacquers act as shields, protecting wood from water and wear. Like stone sealants, these finishes need regular upkeep. Over time, they can fade or crack, so reapplying them periodically keeps your wood looking its best.
When cleaning wood, ditch the harsh chemicals. A mild soap solution works wonders. Dampen a cloth—never soak it—and wipe the surface. Excess water can seep into the grain, causing damage. Always dry the wood immediately with a clean towel.
Dust may seem harmless, but it acts like sandpaper on wood surfaces, creating tiny scratches over time. A quick wipe with a microfibre cloth keeps dust at bay.
Pay special attention to any mould or mildew. These can appear in corners or along seams, especially in humid bathrooms. A mixture of warm water and white vinegar can safely remove mould without harming the wood.
Grout and Sealants
Grout is a small detail that can make or break your bathroom’s look. When it’s clean, your tiles pop. When it’s dirty, everything looks grimy. And unlike tiles, grout is porous, which means it soaks up dirt, water, and bacteria like a sponge.
Why does grout get so filthy? Moisture, soap, and dust mix to create the perfect storm. Over time, these deposits harden, leading to discoloration or, worse, mould. Mould thrives in damp grout lines, leaving unsightly black or green streaks that are as unhealthy as they are ugly.
The fix starts with cleaning. Grout cleaners are specifically designed to penetrate the porous surface, breaking down dirt and bacteria trapped inside. Apply the cleaner generously, let it sit for 5–10 minutes, and scrub with a narrow-bristled grout brush. Focus on small sections to avoid missing spots.
For stubborn stains, you’ll need reinforcements. A mixture of baking soda and hydrogen peroxide can lift even the toughest grime. Apply the paste, let it sit for 15 minutes, and scrub gently. Avoid bleach unless it’s your last resort—it can weaken grout over time, causing cracks.
A grout sealant creates a protective barrier, repelling moisture and stains. Some sealants even include anti-mould properties, which help prevent regrowth in humid conditions. So once the grout is clean, ensure that it has been properly sealed.
Sealing tips:
- Make sure your grout is completely dry before you start.
- Use a small brush or applicator to apply the sealant evenly along the lines.
- Wipe off excess from tiles immediately to avoid streaks.
- Allow at least 24 hours for it to cure properly.
How often should you reseal? Experts suggest sealing grout once a year, but in high-moisture areas like showers, twice a year might be better. If water doesn’t bead up on the surface, it’s time to reseal.
Don’t forget the edges and corners. These areas often get overlooked but are prime spots for mould. A sealant applied here can make a huge difference in maintaining cleanliness.
Grout maintenance is an ongoing task. A quick weekly scrub with a mild cleaner keeps dirt from building up. Use a squeegee after every shower to remove excess water and reduce moisture. Ventilation is also key—keep windows open or exhaust fans running to reduce humidity.
Natural Cleaning Options and Techniques
Cleaning doesn’t always have to mean harsh chemicals. Nature has its own arsenal of grime-fighters that are just as effective—sometimes even better. These natural ingredients clean, deodorise, and disinfect without leaving behind toxic residues.
They include:
- Citric acid: Found naturally in citrus fruits like lemons, it’s a gentle but effective cleaner. It dissolves limescale, banishes hard water stains, and even tackles rust. Got stubborn soap scum on your shower screen? Rub half a lemon directly onto the surface and watch it vanish.
- Bicarbonate of soda, or baking soda:. Its abrasive texture makes it a perfect scrub for sinks, tiles, and even grout. But it doesn’t just clean—it also neutralises odours. Sprinkle it in your toilet bowl, leave it for 10 minutes, then scrub and flush. It’s simple, cheap, and chemical-free.
- White vinegar: A disinfectant, its acidity breaks down bacteria and mould, leaving surfaces sanitised and streak-free. Mix with water and you can use it on chrome fixtures, glass, and even mirrors. Just avoid porous surfaces like marble, as vinegar’s acidity can damage them.
- Essential oils: Oils like tea tree, eucalyptus, and lavender have natural antibacterial properties. Add a few drops to your homemade cleaners for an extra boost of cleanliness. Tea tree oil, in particular, is great for tackling mould in grout or along bathroom corners.
DIY Bathroom Cleaning Recipes
You can choose to make your own bathroom cleaning products.
- All-purpose cleaner: Combine two cups of water, one cup of white vinegar, and a tablespoon of baking soda. Add 10 drops of your favourite essential oil for fragrance. This cleaner works on counters, sinks, and even your toilet seat.
- Grout cleaner: Mix baking soda and water into a paste. Apply it to grout lines, let it sit for 15 minutes, and scrub with a soft brush. For extra power, spray with vinegar before scrubbing. The fizzing action helps lift stubborn dirt and kills bacteria.
- Glass cleaner: Blend equal parts water and vinegar, with a splash of rubbing alcohol for faster drying. Use a microfibre cloth to wipe down mirrors and windows for a streak-free shine.
Of course, this will take up time to prepare, and may not always get you the desired result. Commercial bathroom cleaning products formulated to target specific surfaces and dirt problems will get you results faster.
Building Effective Bathroom Cleaning Habits
Developing a Routine
Consistency is the secret to a spotless bathroom. And you don;t have to spend hours hours scrubbing. Break the job into manageable tasks.
Start with daily habits. Wipe down your sink and counter every evening. Toothpaste splatter, soap residue, and water spots can quickly pile up, so a quick swipe prevents them from becoming a stubborn mess. Squeegee your shower doors after every use. This simple habit reduces water spots and hard water stains dramatically.
Move on to weekly tasks. These include scrubbing the toilet bowl, cleaning the mirrors, and giving your tiles a light clean. It’s also a good time to tackle commonly missed areas, like behind the taps or under the sink. A weekly deep clean keeps your bathroom fresh and cuts down the need for heavy-duty scrubbing later.
Finally, set aside time for monthly maintenance. Deep-clean grout lines, descale showerheads, and polish chrome fixtures. If you’ve been consistent with daily and weekly tasks, these monthly jobs won’t feel overwhelming.
Checklists can go a long way here to ensure you don’t miss anything. Write down your daily, weekly, and monthly tasks and stick it somewhere visible, like the bathroom door. It keeps you on track and lets everyone in the household know what needs doing.
Preventative Measures
Bathrooms are damp by nature, which makes them a breeding ground for mould and mildew. But you can stop these nasties in their tracks with a few simple steps.
- First, invest in a good extractor fan. Running it during and after showers pulls moisture out of the air. No extractor fan? Crack open a window to let fresh air flow through. Less humidity equals less chance of mould.
- After showers or baths, give tiles, taps, and counters a quick wipe with a microfibre cloth. It takes seconds and prevents water spots, soap scum, and grime from setting in.
- Don’t ignore the small leaks. Dripping taps and slow drains aren’t just annoying—they create damp environments where bacteria thrive. Fix them quickly to avoid bigger problems down the line.
- Storage also plays a role in prevention. Keep toiletries and cleaning products off damp surfaces by using caddies or shelves. This not only reduces clutter but makes it easier to wipe down surfaces.
Family Participation
Cleaning doesn’t have to fall on one person. Involve the whole household. Even kids can pitch in with simple tasks like wiping down the sink or refilling soap dispensers.
Assign specific roles to each family member. One person can take care of the mirrors, another can scrub the toilet, and someone else can empty the bins. Rotating these tasks keeps things fair and prevents burnout.
Set clear expectations. Explain what needs to be done and why it matters. If everyone does a little, the bathroom stays clean without anyone feeling overwhelmed.
To make it fun for younger kids, turn cleaning into a mini-challenge. Who can wipe the sink the fastest? Who gets all the soap scum off the tiles? Little incentives like stickers or small rewards can motivate them to join in.
Tackling Common Bathroom Cleaning Challenges
Every bathroom comes with its quirks, but some problems are universal. Hard water stains, soap scum, and persistent mould are the worst offenders. What do you do about them?
Hard Water Stains
Those cloudy white spots on taps, tiles, and glass are caused by minerals like calcium and magnesium in your water.
To combat it, you need commercial bathroom cleaning products with acidic properties. For home solutions, you can use vinegar—soak a cloth, wrap it around the affected area, and leave it for 15 minutes. Depending on the level kind of staining involved, you may need to repeat this multiple times. For commercial cleaners that have been formulated to work on such stains, it will be faster.
Showerheads are a hotspot for limescale buildup. If yours is clogged, detach it and soak it in a vinegar-water mix overnight. For fixed showerheads, fill a plastic bag with vinegar, secure it over the head with a rubber band, and let it sit. The next morning, rinse it clean, and water will flow freely again.
Prevention matters too. Wipe down wet surfaces after every use. Use a squeegee on glass, dry taps with a microfibre cloth, and consider installing a water softener to reduce mineral content in your water.
Soap Scum
Soap scum builds up gradually, leaving dull white films on tiles, glass, and tubs. This scum is a mix of soap, body oils, and hard water minerals. That’s why it’s so tough to remove.
Start with a targeted scum remover – and be sure to assess the reliability of the brand in question. These products break down the sticky residue without damaging surfaces. For a DIY approach, mix equal parts vinegar and washing-up liquid. Spray it on, let it sit for 10 minutes, and scrub with a sponge.
If you’re dealing with stubborn scum on tiles or grout, a paste of baking soda and water can help. Apply it, scrub with a soft brush, and rinse. For shower doors, a microfibre cloth and warm water can often lift lighter deposits without any chemicals.
Switching to liquid soap can help prevent scum in the first place. Bar soaps leave behind more residue because of their high-fat content. Liquid soap, on the other hand, rinses cleaner and leaves less mess.
Persistent Mould and Mildew
Look for black or green patches on grout, corners, or ceilings. Mildew, a milder form of mould, shows up as white or grey powdery spots. Their spores can trigger allergies, asthma, and respiratory issues, so ignoring it isn’t an option.
To remove mould, use a cleaner with fungicidal properties. Spray the affected area, let it sit for 10 minutes, and scrub with a brush. For a natural alternative, mix one part white vinegar with one part water. Vinegar kills mould species too, making it a home solution for mild infestations.
Stubborn patches may need more firepower. A bleach solution (one part bleach to ten parts water) works well for tough areas. But use it sparingly—bleach can weaken grout over time.
Myths About Bathroom Cleaning Debunked
Cleaning myths can lead to wasted effort, damaged surfaces, or both. It’s time to set the record straight. Let’s break down three common misconceptions that might be sabotaging your bathroom-cleaning routine.
7.1 Myth: The Stronger the Smell, the Better the Cleaner
A strong smell might scream “clean,” but it’s not a measure of effectiveness. Fragrance is often added to cleaners to make them more appealing, not more powerful.
In fact, overly perfumed products can cause problems. Some people experience headaches or respiratory irritation from strong scents, especially those with asthma or allergies. According to the European Lung Foundation, 1 in 3 people with asthma is affected by chemical fragrances.
What really matters is the active ingredients. A lightly scented cleaner with proven antibacterial agents or descaling properties will outperform a strongly fragranced one that lacks substance. Don’t be fooled by a floral scent—it’s what’s in the bottle that counts.
7.2 Myth: Bleach is the Ultimate Cleaner
Bleach gets a lot of credit, but let’s not overhype it. Yes, it’s a powerful disinfectant. It kills bacteria, viruses, and mould spores. But here’s the truth: bleach doesn’t actually clean.
What does that mean? Bleach whitens stains, making surfaces look clean, but it doesn’t remove dirt or grime. Scrubbing is still required to lift grease, soap scum, or limescale. Without that step, all you’ve done is mask the problem.
Bleach also isn’t suitable for every surface. It can damage grout, corrode metal, and discolour porous materials like stone. And let’s not forget safety. Bleach fumes are harsh and can irritate your skin, eyes, and lungs. When mixed with other chemicals, like ammonia, it produces toxic gas.
So, when should you use bleach? For disinfecting high-touch areas like toilet seats or cleaning mould in small patches. But don’t rely on it as your go-to for everything.
7.3 Myth: One Product Works for All Surfaces
Wouldn’t it be nice if one product worked everywhere? Unfortunately, bathrooms are made up of different materials with different needs. Using one cleaner across the board isn’t just ineffective—it can cause damage.
Take natural stone, for example. Acidic cleaners like vinegar are fantastic for limescale on tiles but can etch and ruin marble or granite. Similarly, abrasive powders that work wonders on grout can scratch glass or chrome.
Even wood requires its own approach. Damp sponges or generic sprays can warp or discolour it over time.
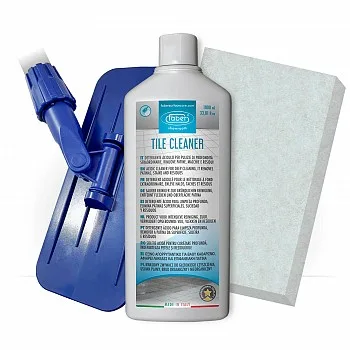
Specialised cleaners exist for a reason. They’re designed with specific materials in mind, ensuring effective cleaning without causing harm. Invest in products tailored to your surfaces. A tile cleaner for ceramic, a descaler for chrome, and a neutral pH cleaner for stone or wood can make all the difference.
