
Battle the Grime with Effective Bathroom Cleaning Products
Your bathroom will eventually get messy. Every flush, shower, and splash adds to the build up of grime. Warm, damp conditions make it a breeding ground for bacteria, mould, and mildew.
You want to keep your family safe and sound. A grubby bathroom is a playground for nasty bugs like E. coli. Every time you flush, tiny bacteria-filled droplets can land six feet away. That’s from your sink to your toothbrush. Plus bathrooms also carry unpleasant odours that linger if not dealt with properly. No one wants a guest to walk into a smelly loo.
So which products can you use to maintain the bathroom?
Types of Cleaning Agents
Knowing what products work best—and where to use them—saves you time and effort. What makes a product “right,” though? That depends on what’s getting cleaned. Tiles, mirrors, grout, and toilets all demand different approaches.
And yes, the time you spend cleaning matters too. Find yourself taking an hour every week cleaning your bathroom? Wouldn’t it be nice to cut that down? With the right agents, you can. They include:
Acidic Cleaners
Acidic cleaners work like a charm on limescale, rust, and soap scum. Got hard water stains on your tiles or shower screen? They dissolve those mineral deposits fast.
However, these are strong and should only be used on materials like porcelain and ceramic tiles. Do not use them on marble and limestone, The acid will etch and damage the surface, leaving dull patches that no amount of polishing can fix.
Alkaline Cleaners
Use these to break down oils, grease, and organic grime. They’re not as harsh as acidic options but still pack a punch. Ideal for cutting through the residue from shampoos, soaps, and body oils that can clog your drains and coat your surfaces.
Just remember, they’re not ideal for glass or mirrors, where streaking can be a problem.
Neutral Cleaners
Neutral cleaners sit in the middle of the pH scale. They’re mild and versatile, for everyday use. If your bathroom is relatively clean and you want to maintain that freshness without damaging surfaces, these are the ones to pick.
They work well on delicate materials, like marble and granite, which can’t handle the harshness of acids or alkalines. Neutral cleaners are also great for laminate surfaces, which often lose their shine with repeated exposure to stronger products.
Forms of Cleaning Products
This looks at the mode in which the bathroom cleaning products function.
Liquids and Sprays
They are easy to apply, and work well on most surfaces. Like getting rid of watermarks on your shower glass. A quick spray and wipe sorts it out. Need to clean a countertop? Liquid cleaners cover large areas without effort.
Sprays are handy hard-to-reach spots. Like under the toilet rim or behind the taps. A fine mist can get into corners where scrubbing tools can’t. It’s no wonder 60% of UK households favour sprays for bathroom cleaning.
Foams
Foams are particularly popular for vertical surfaces. They cling to walls, tiles, and shower doors, giving the product more time to work its magic. If you’re battling soap scum or stubborn mildew, they will come in handy..
Here’s why: gravity doesn’t pull foams down as quickly as liquids. This means you can spray your shower tiles, leave the foam for a few minutes, and return to scrub less. It’s a smart way to let the product do the heavy lifting.
Gels
Need something with more staying power? Gels stick where you put them, making them ideal for targeted cleaning. Toilets, in particular, benefit from gel cleaners. They adhere to the bowl, slowly breaking down limescale and stains.
But gels aren’t just for loos. You can also use them on grout lines, around sinks, and even on fixtures. Their thick consistency ensures that every drop works where it’s needed most.
Powders
Powders great for scrubbing — abrasive enough to tackle tough stains but gentle enough not to damage most surfaces. Need to brighten up dull grout or remove rust stains from a sink? Powders get the job done.
To use, simply sprinkle the powder onto the area, add a bit of water, and scrub.
Which One’s Right for You?
It depends on the job. Sprays are great for quick, all-over cleaning. Foams excel on vertical surfaces where run-off is an issue. Gels are perfect for targeting trouble spots, while powders handle the toughest stains.
No single product does it all, so consider what you’re cleaning and choose wisely. Whether you’re spritzing, scrubbing, or letting foam work its magic, the right form saves you time and effort.
Essential Bathroom Cleaning Tools
Now for the tools that do the work:
Brushes and Scrubbers
-
Toilet Brushes
You need them for all that unsightly muck that is clicking to the walls of the toilet. The stains and limescale in particular. They are also important for agitating the cleaning product being used, to destroy the bacteria in the bowl.
Look for a brush with firm, flexible bristles. It needs to get under the rim and into every curve of the bowl. Some newer designs even feature angled bristles, making it easier to reach awkward spots.
And don’t forget the holder. A ventilated holder helps the brush dry faster, which reduces bacteria buildup. No one wants a damp, smelly brush lurking in the bathroom.
-
Tile and Grout Brushes
Grout lines are dirt magnets. They trap soap scum, mould, and mildew, turning white lines grey. Regular brushes don’t cut it here. You need one that is narrow, with stiff bristles, to really get into the grooves.
Why is this so important? Mould doesn’t just look bad—it’s harmful. Black mould, often found in grout, can trigger allergies and respiratory problems.
For tiles, a broader brush works better. It covers more surface area, so you’re not scrubbing endlessly. Rubberised grips on the handle make it more comfortable, especially for larger jobs.
Plastic handles are lightweight and durable, while stainless steel options feel sturdier but can be heavier. Pick one that feels comfortable in your hand—you’ll be using it a lot.
Sponges and Cloths
Used correctly, sponges and cloths tackle everything from stubborn stains to delicate polishing jobs.
-
Cellulose Sponges
Made from natural fibres, they can absorb up to 20 times their weight in water. So fewer trips to rinse and more time spent actually cleaning. They’re also gentle on surfaces, so they won’t leave scratches on ceramic, glass, or plastic. You can use the cellulose responses to wipe down down sinks, bathtubs, or tiles, as well as getting rid of spilled toothpaste, dried soap, and water stains.
-
Abrasive Sponges
For the tougher jobs, reach for an abrasive sponge. You’ll find them with one soft side and one rough side. That rough surface is for when you’re dealing with baked-on dirt, soap scum, or mould patches. Here you get more cleaning power to remove more grime from textured tiles compared to regular sponges. However, abrasive sponges can damage delicate surfaces like glass, polished stone, or laminate. Always test them in a small, inconspicuous area first.
-
Microfibre Cloths
The fibres are split into thousands of tiny loops, increasing their surface area and cleaning power. In fact, microfibre cloths can remove up to 99% of bacteria with just water—no chemicals required. Use them on mirrors, glass, and shiny fixtures.
These cloths are also reusable and machine-washable. Just avoid fabric softeners during the laundry process; they coat the fibres and reduce effectiveness.
Specialised Tools
When it comes to getting those bathroom cleaning products to hard-to-reach spots or keeping your bathroom glass streak-free, you need a different set of equipment. These aren’t your everyday items—but are highly effective.
-
Squeegees
After every shower, water droplets cling to your screens and tiles. Left alone, they dry into unsightly spots and streaks. Over time, these can even lead to stubborn limescale buildup.
A quick swipe with a squeegee removes water from the surface before it has a chance to dry. The result is crystal-clear glass and a lot less elbow grease later.Most squeegees come with rubber blades for smooth gliding. You’ll find some with angled heads, which are great for tight corners.
-
Extendable Scrubbers
Scrubbing high walls, ceilings, or the back of your shower can be strenuous. That’s where extendable scrubbers come to the rescue. These tools are designed to stretch, bend, and reach where your arms can’t. The likes of tall tiles, awkward corners, or even the ceiling above your shower.
Many come with interchangeable heads—some for scrubbing, others for wiping or dusting. This flexibility means you only need one tool for several tasks. They also protect your back and shoulders from awkward stretching.
Get yourself a scrubber with a sturdy, light handle. Aluminium handles are a popular choice because they’re durable and won’t tire you out. Some designs even allow the head to pivot, making it easier to clean angled surfaces.
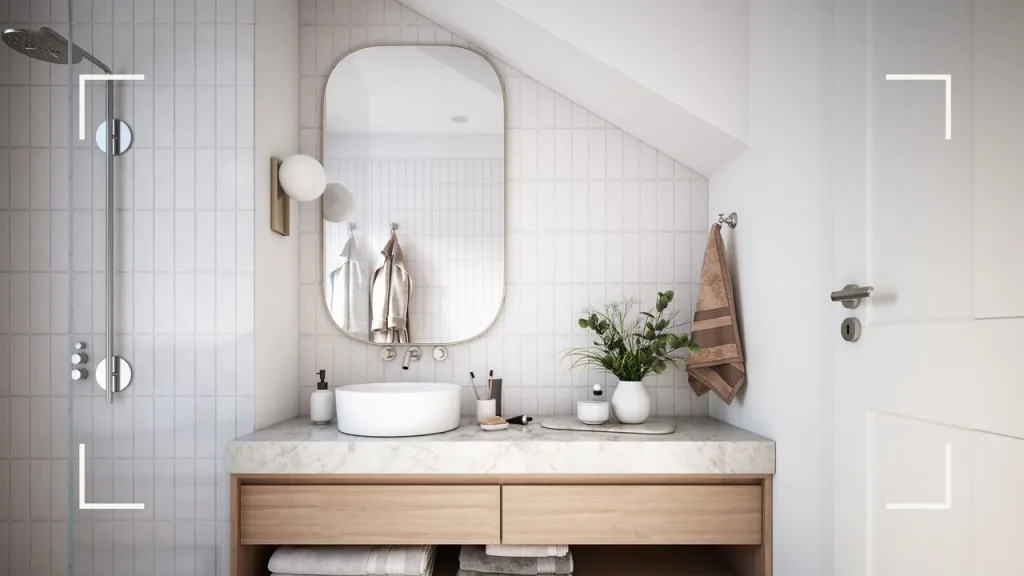
Selecting the Right Products for Different Surfaces
Tiles and Grout
-
Tile Cleaners
Soap scum, a mixture of soap residue and mineral deposits on tiles build up into a stubborn layer that simple scrubbing won’t remove.
Good tile cleaners dissolve this grime effectively, saving you hours of scrubbing. They’re particularly handy for ceramic and porcelain tiles. If your tiles have a textured surface, a cleaner with a foaming action works best, as it can reach into those tiny grooves for a thorough clean.
Hard water stains are another issue. These chalky white marks form when water evaporates, leaving behind calcium and magnesium. A tile cleaner with acidic properties cuts through these deposits easily.
-
Grout Cleaners
Grout is a magnet for dirt, mould, and mildew. Its porous nature absorbs moisture and stains, making it one of the toughest parts of the bathroom to clean. Standard cleaners won’t cut it here—you need a specialised grout cleaner.
Grout cleaners are formulated to penetrate these tiny spaces, lifting dirt and killing bacteria at the source. Most are bleach-based or oxygenated, providing the deep clean grout demands.
If your grout has turned black or yellow, it’s likely hosting mould or mildew. Here you will need bathroom cleaning products with anti-mould agents.
When cleaning tiles, start from the top and work your way down. This prevents dirty water from running over already-clean areas. For grout, use a narrow brush with stiff bristles. An old toothbrush can work too, though you’re much better off using dedicated grout brushes.
For stubborn grout stains, let the cleaner sit for 10-15 minutes before scrubbing. If discolouration persists, consider using a grout whitening pen for a fresh, bright finish.
Glass and Mirrors
-
Glass Cleaners
Shower doors are constantly exposed to water, soap, and shampoo residue. Over time, this builds up into a cloudy film that’s hard to remove.
A high-quality glass cleaner breaks down these residues without leaving streaks. Most are ammonia-based, which evaporates quickly, leaving the surface clear. Others use vinegar or alcohol for a similar effect, ideal for households avoiding harsher chemicals.
Note that streaks are also caused by overusing products. Less is more with glass cleaners—one or two sprays per section are plenty. Use a microfibre cloth or a squeegee to wipe clean for the best results.
For tougher stains, like limescale on shower doors, look for cleaners with descaling agents. These break down mineral deposits, restoring clarity to your glass.
-
Mirrors
Here you’re dealing with fingerprints, toothpaste splatter, and steam, all of which blur mirror surfaces. You can’t get ready in front of a mirror that’s foggy or streaked.
When cleaning mirrors, spray your glass cleaner onto the cloth—not the mirror. This prevents excess liquid from pooling at the edges, which can damage the backing over time. Work in a zigzag motion for even coverage and no streaks.
You can also buff your mirror with crumpled newspaper after cleaning. It adds a final shine and removes any lingering streaks.
Fixtures and Fittings
These are your taps, showerheads, and towel rails—the spots that quickly collect grime, fingerprints, and watermarks. Metal cleaners are handy for keeping them sparkling. Just make sure the product matches your fixture’s material, like chrome, stainless steel, or brass.
To clean, start simple: wipe the fixture with a damp cloth to get rid of loose dirt. Next, follow the instructions on your chosen cleaner—either apply it directly or onto a soft cloth. Use gentle circular motions, focusing on stubborn spots or stains.
Let the cleaner do its thing for a few minutes. Then, grab a dry microfibre cloth and buff the surface until it shines.
For showerheads, soak them in a limescale remover. If removing the showerhead isn’t an option, tie a bag filled with the solution around it and leave it for 30 minutes before rinsing.
Don’t skip polishing! A soft cloth is all you need to finish the job, leaving your fixtures gleaming and streak-free.
Preventing Future Streaks and Spots
Prevention saves you from endless scrubbing. After every shower, use a squeegee on glass doors to remove water droplets. For mirrors, keep a small microfibre cloth nearby to wipe off steam and splatters daily.
A weekly clean keeps fixtures looking like new. If you live in a hard water area, consider installing a water softener to reduce limescale buildup on glass and metal surfaces.
Choosing the Right Cleaner
Chrome fittings need gentler solutions to avoid scratching. Stainless steel can handle more robust products but still benefits from ones with polishing agents. Always check the label to ensure compatibility with your fixtures.
Avoid abrasive cleaners or scrubbing pads on polished metal. They’ll create tiny scratches that dull the finish and make it more prone to tarnishing.
Countertops and Vanities
Your countertops and vanities are some of the most used areas in your bathroom. They’re home to toothpaste smudges, soap residue, and splashes of water. Over time, this daily wear leaves them looking dull and tired. Surface cleaners are designed to keep countertops spotless without damaging their finish.
-
For Marble and Granite
These natural stones are luxurious but high-maintenance. Their porous nature causes them to easily absorb spills. Plus the wrong cleaner can strip away their sealant, leaving them vulnerable to damage.
Work with pH-neutral cleaner here. Acidic or abrasive products will etch the surface, leaving dull marks that are impossible to remove. A good stone cleaner lifts dirt while preserving the sealant.
-
For Laminate Surfaces
Laminate is far more forgiving, though it`s still advisable to get a product that has been formulated for it. Most multi-surface sprays work well here, cutting through grease and grime without leaving streaks. However, avoid overly abrasive products. Scratches compromise the laminate’s protective layer, increasing chances of water damage.
A quick wipe with a damp microfibre cloth is often enough for daily maintenance. For tougher spots, spray the cleaner directly onto the surface and let it sit for a few moments before wiping.
Application Techniques
Spraying directly onto countertops might seem quicker, but it’s not always the best approach. Instead, spray onto a cloth or sponge, then apply it evenly. This method avoids oversaturation and keeps cleaners from pooling around edges, which can damage certain materials.
When cleaning, focus on circular motions. This helps lift dirt and polish the surface simultaneously. For stubborn stains, let the bathroom cleaning product sit for a minute or two before scrubbing gently.
Polishing and Finishing
Once your countertop is clean, take an extra step to make it shine. For stone surfaces, use a dedicated polish every few months. It adds a protective layer and enhances the natural patterns.
Laminate surfaces can benefit from a final buff with a dry microfibre cloth. This simple step removes streaks and leaves the surface looking fresh.
Always use coasters under bottles and jars to avoid water rings. Clean up spills immediately—especially those containing acidic substances like lemon juice or vinegar.
For stone surfaces, reseal them annually. A good sealant creates a barrier against stains and makes cleaning much easier.
Value Of Eco-Friendly and Natural Cleaning Alternatives
Harsh Chemicals Are Hurting You
Traditional cleaning products are loaded with irritants. Ammonia, bleach, and synthetic fragrances attack your skin, lungs, and eyes. Yes, they’re strong. But they also put your health on the line.
Eco-friendly options ditch the nasty stuff. They use plant-based ingredients that are gentler and safer for you. Got sensitive skin or allergies? These products are a lifesaver. If you’re always coughing after using a spray, you already know the risk.
Even better, eco products don’t just clean—they’re biodegradable. They break down naturally without leaving toxic residues. This is crucial if you’ve got kids or pets. No more worrying about curious hands or paws touching harmful chemicals.
Your Cleaning Habits Are Polluting Waterways
Every time you rinse traditional cleaners, you send toxins down the drain. These chemicals poison aquatic life and mess up ecosystems. Chlorine, phosphates, and dyes are the worst offenders.
Eco-friendly cleaners solve this. They’re biodegradable and avoid harmful ingredients altogether. Rivers and oceans thank you every time you switch.
But it’s not just what’s inside that matters. Plastic waste is another beast. Millions of tonnes of it end up in the ocean each year, much of it from cleaning bottles. Choosing products with recyclable or refillable packaging slashes your environmental footprint.
Here’s a shocking fact: 8 million tonnes of plastic hit the ocean annually. Your choices can help bring that number down.
The Feel-Good Factor
Using eco-friendly products feels different. There’s no guilt, no harsh fumes, and no harm to marine life. You’re making your home safer and doing right by the planet.
Modern eco cleaners don’t compromise on performance. Many are as powerful as chemical cleaners—sometimes better. Look for labels like “plant-based,” “non-toxic,” or “biodegradable.” Certifications from trusted bodies are a bonus.
Not sure where to start? Try one product. Maybe an eco glass cleaner or a multi-surface spray. Once you see the results, you’ll want to switch more.
Small Swaps, Big Impact
Every eco-friendly choice matters. Each time you clean without releasing toxic chemicals, you’re making a difference. It’s not just about cleaning; it’s about cleaning smarter. Make the swap today—you won’t look back.
Common Natural Cleaning Agents
Natural cleaning agents are simple, safe, and surprisingly effective at tackling grime. And you probably already have them in your kitchen. They include:
-
Vinegar
Its acidity breaks down stubborn deposits on tiles, grout, and showerheads. It can kill most of the mould species, making it a natural alternative to harsh chemicals.
To use it, mix equal parts white vinegar and water in a spray bottle. Apply directly to the affected area, let it sit for 10–15 minutes, then scrub with a brush.
Worried about the smell? It fades quickly as the vinegar dries. Or you can add a few drops of essential oil to mask the odour.
-
Baking Soda
The fine texture of baking sodaworks as a mild abrasive, making it ideal for scrubbing sinks to toilets without scratching them.
For a simple paste, mix baking soda with a little water. Apply it to stains or soap scum, let it sit for a few minutes, and scrub away. Got a clogged drain? Combine baking soda with vinegar for a fizzy reaction that clears blockages naturally.
Baking soda also neutralises odours by absorbing acidic and basic particles. So you can use it to freshen up drains or eliminate bad smells from bins.
-
Lemon Juice
Its natural acidity kills bacteria and leaves your bathroom smelling citrusy fresh. It’s especially effective on limescale and soap scum.
Use it to shine taps and fittings. Simply cut a lemon in half, sprinkle salt on the cut side, and rub it over the surface. Rinse with water and buff with a cloth for a gleaming finish.
Lemon juice is also a natural deodoriser. Add it to your toilet bowl, let it sit for 30 minutes, then scrub. You’ll be left with a clean toilet and a bright, zesty scent.
Safety Considerations When Using Bathroom Cleaning Products
- Reading Labels and Instructions: Labels aren’t just for show. They tell you everything you need to know—where to use the product, how to apply it, and if it needs diluting. Ignore them, and you could damage surfaces—or worse, your skin.
Some cleaners are super concentrated. Used straight, they can burn skin or ruin materials. Always dilute as directed. Over-diluting can make the product ineffective, while under-diluting can make it too harsh.
- Ventilation: Good airflow is vital especially when using products with strong fumes. Many bathroom cleaners release strong chemicals like ammonia or bleach into the air. In small spaces, these fumes can irritate your throat, eyes, and lungs.
Open a window, turn on the fan, or leave the door open. Scrubbing something particularly tough? Take regular breaks for fresh air. It’s better than feeling dizzy halfway through.
- Protective Gear: Your skin and eyes are often the first to come into contact with cleaning agents. Rubber gloves prevent irritants from causing dryness, redness, or even chemical burns. For products with strong fumes, wearing a mask can reduce inhalation risks.
Splashes from sprays or liquids can irritate or damage your eyes. If you’re using products with warning labels like “corrosive” or “danger,” consider getting goggles.
- Storage and Disposal: Keep cleaning products out of reach of children and pets—ideally in a high cupboard with a secure latch. Even “natural” products can cause harm if ingested.
Never store them in unlabelled containers. It’s easy to mistake them for something harmless, leading to accidents.
Disposal is equally important. Never pour leftover products down the drain unless the label specifically says it’s safe. Check local regulations for disposing of hazardous waste, especially for items like bleach or solvent-based cleaners.
Common Bathroom Cleaning Myths and Misconceptions
Myth 1: More Soap Equals Better Cleaning
This might sound logical at first. After all, soap is part of the cleaning, right? But using more soap doesn’t mean you’re getting better results.
In fact, the opposite is often true. Excess soap can leave behind a sticky residue that attracts dirt. This buildup can dull shiny surfaces like countertops, tiles, and even mirrors. Instead of sparkling clean, you’re left with a hazy film that takes extra effort to remove.
For example, when cleaning your tiles, a small amount of cleaner diluted with water is usually enough. Overloading on product not only wastes soap but also requires more rinsing. The more soap you use, the more likely you’ll see streaks and spots after drying.
Myth 2: Bleach Cleans Everything
Bleach is a strong disinfectant, but it’s not a miracle cleaner. While it kills bacteria and mould, it doesn’t actually clean dirt or grime.
If you’ve got muddy footprints on your bathroom floor or soap scum in the shower, bleach won’t help. It needs a surface that’s already clean to do its best work.
Even worse, bleach can damage some materials. It’s notorious for dulling natural stones like marble and granite. Used on metals, it can corrode finishes and leave them tarnished.
Myth 3: Vinegar Works on Everything
Vinegar is a cleaning favourite, but it’s not a one-size-fits-all solution. Yes, it’s fantastic for cutting through limescale and dissolving mineral deposits. But vinegar’s high acidity makes it a poor choice for certain surfaces.
Marble and limestone are particularly vulnerable. Vinegar can etch and dull these natural stones, leaving irreversible marks. The same goes for some ceramic tiles with delicate glazes.
Always check what your surface can handle before reaching for the vinegar bottle. A safer alternative for these materials is a pH-neutral cleaner.
Myth 4: All Natural Products Are Safe
Just because something is “natural” doesn’t mean it’s harmless. Lemon juice, for instance, is acidic enough to damage certain surfaces over time. Baking soda, while gentle on most surfaces, can still cause scratches if used improperly.
Always test natural cleaners on a small, hidden area first. And remember, even natural ingredients can irritate skin or cause allergies if used in high concentrations.
The Truth? Less Is More
When it comes to cleaning, simple is often better. Use the right amount of product, choose the right tools, and understand what works best for each surface.
Regular Cleaning Schedule
Waiting until your bathroom is visibly dirty only makes cleaning harder.
- Daily Tasks: After showering, use a squeegee or cloth to remove water from tiles and glass doors. This prevents water spots and limescale buildup.
Wipe your sink and countertop every evening. Toothpaste splatters and water marks are easier to remove when fresh. Keep a microfibre cloth handy for this—it’s efficient and leaves no streaks.
If your bathroom floor gets wet, mop it up immediately.
- Weekly Deep Cleaning: Focus on high-touch areas like taps, light switches, and door handles. These are hotspots for bacteria and are often overlooked.
Scrub your toilet bowl with a brush and use a disinfectant cleaner. Pay attention to under the rim, where the limescale tends to hide.
Work on your tiles and grout weekly to stop soap scum and mildew from setting in as well.
